Troubleshooting
Computer
The PC will not turn on
-
If you are running the PC from the inverter on the robot (for battery power or external AC2DC) Check that the power switch on the inverter is set the the "ON" position.
-
Try holding the PC power button down for a 2-5 seconds
-
Try testing the PC connected to AC power instead of the inverter
-
Try running the PC from an external power source. If this does not work check for unseated power cables
-
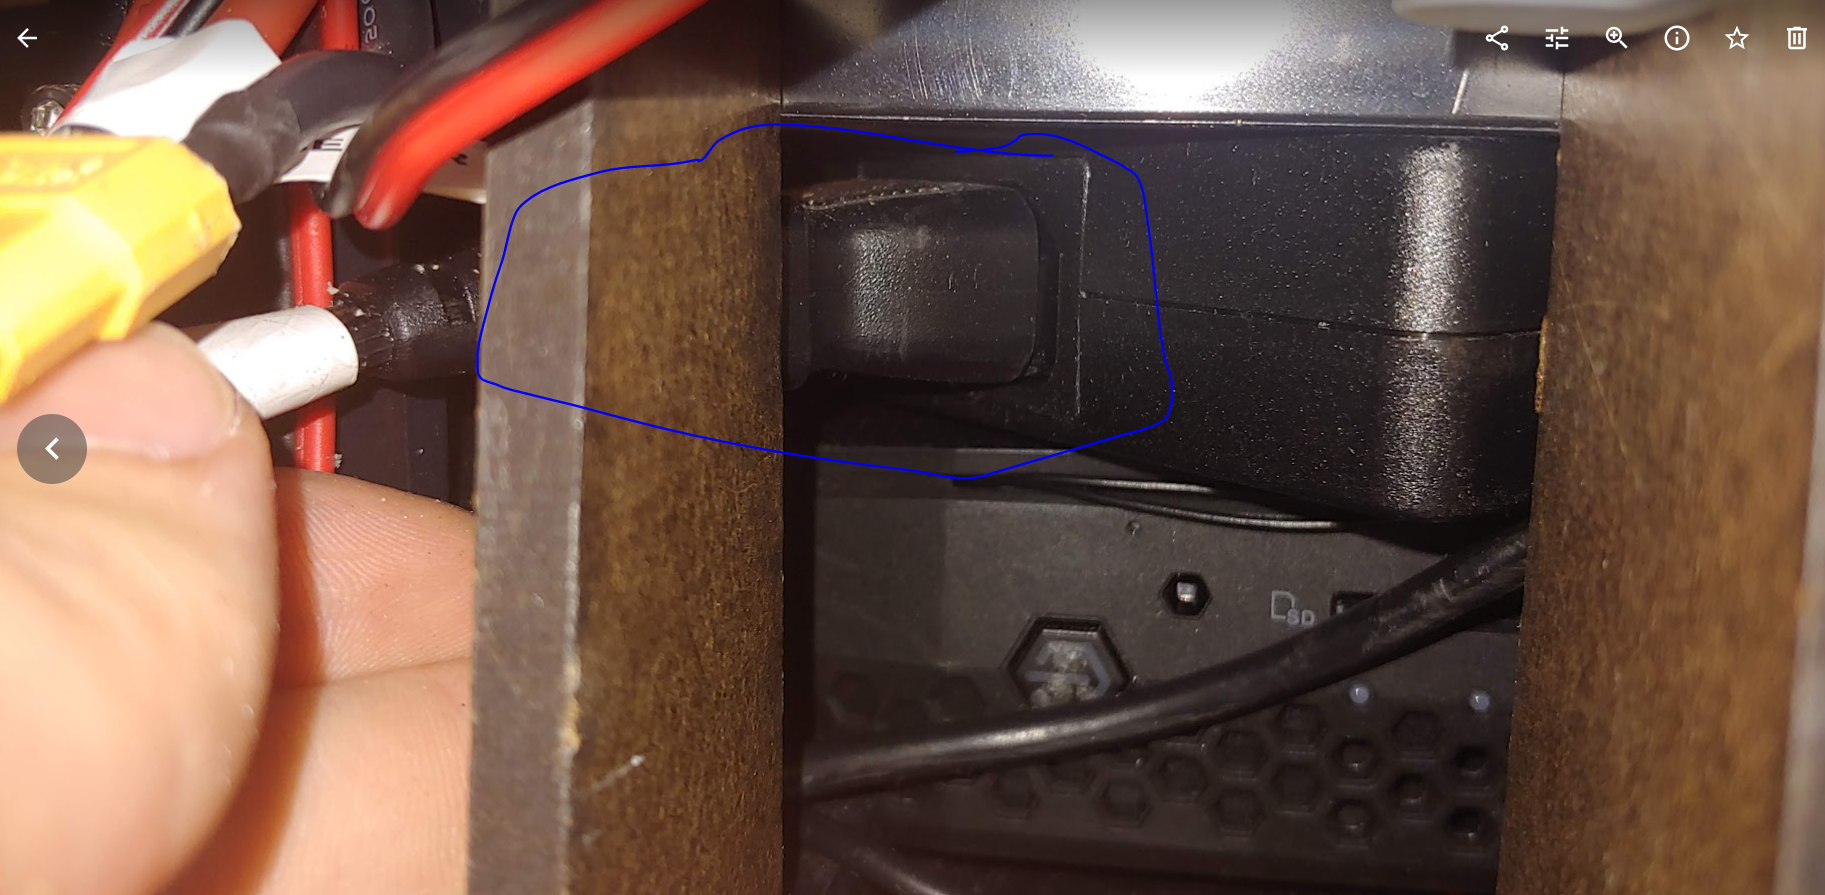
Check the power cable has not become unseated at the DC end which plugs into the computer (see blue circle)
-
-
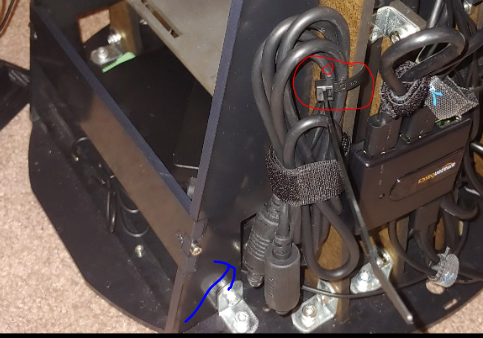
Check the AC power cable plugging into the power brick. You can access this from the back-right of the robot. The power brick is between the computer top and the battery bay bottom
-
Communication/Control General
Module will not connect to software control
- Check the micro usb cable is plugged into the microcontroller. If not you might get a joint state failure message. Check at the USB A and micro usb ends of the connection
Joystick Node Control Not working
- The "Mode" button LED should not be on. Press the "Mode" button to turn the LED off. If the LED is on the buttons and axis may not work properly
Laser scanner:
-
Operation Time Out things to try:
-
Unplug and replug the white 5 wire cable that connects the laser scanner to the usb cable.
-
Unplug and replug the microUSB cable side
-
Unplug and replug the USB A side into the hub
-
USB port binding error
-
Unplug and replug the white 5 wire cable that connects the laser scanner to the usb cable.
-
Unplug and replug the microUSB cable side
-
Unplug and replug the USB A side into the hub
Head
The head is not displaying
-
Is the projector on?
- If the projector has power a blue screen should show in the head and the LEDs on the projector case should be blue.
-
Is the HDMI cable plugged in and working properly?
- Make sure the cables are connected properly
- Try to plug a different cable into the projector to test if the cable or the HDMI switch is working.
-
The HDMI splitter might not be functioning properly. Sometimes unplugging the usb power to the splitter can solve the issue. Alternatively, plugging the usb power in might also help. Do this when the robot is shut off, that is do not do this while the robot is powered on.
-
If the screen is only displaying one shade of colors, you might also try unplugging the projector cable at the projector (the barrel jack) and inspecting for any debris and plugging it back in.
Arms
The arms are not moving
-
Check that the arms are not past the safe position. There is a limit in the microcontroller for the abduction/adduction DOF that when it passes it the arms are not allowed to move. You can carefully lift or lower the arm to the neutral and try again. Be sure to shutdown the motor power before backdriving the robot
-
A possible USB problem
- Check that the two microcontrollers have their orange light lit.
-
A possible power problem
- Did the motors make a boot up noise when power was added? They should.
- Are all of the power cables going into the arm plugged in securely? If they fall out you can add a zip tie to hold them in place.
The arms are not moving smoothly or are stuck
-
Check for debris in the transmission using a flash light.
-
Check that the friction roller (blue rubber on the motor shaft) is not loose and spinning freely wrt the shaft
-
Try replacing the friction roller. You may have a roller that has hardened over time or a flat spot in the rubber or a defect that is leading to binding.
-
Replacing friction roller in arm
Base
No data connection
- Check that all the usb plugs are plugged in. When the robot is connected correctly to a computer the microcontroller will have a light on and so will the position sensors and the USB hub. The laser scanner will also spin.
The Base is not moving
- Check if the fuse is blown. If it is blown you will need to replace the fuse before the module can operate. Be sure to identify the source of the fuse blowing before replacing the fuse as it would be best to fix any issue first.
Torso:
The Torso is not moving
- Check if the fuse is blown. If it is blown you will need to replace the fuse before the module can operate. Be sure to identify the source of the fuse blowing before replacing the fuse as it would be best to fix any issue first.
The Torso motion is jerky.
-
The counter mass may not be correct. Check the default configuration for the counter mass. There should be two steel plates at underneath the SLA battery. The battery MUST be centered in the battery bay.
- Depending on the configuration of the robot the counter mass may need to be reconfigured. The nominal balancing is achieved with two plates under the battery. The process can be found* here* to verify this or to counter balance the system under another configuration.
-
Check that the motor gear is not slipping
-
Check that the torso hub (large metal flanged hub at the center of the robot) connection to the hex shaft is secure.
-
Check that the wedge gear connection to the hex shaft is secure.
-
Check that the data and power wires the route up the torso frame and into the upper torso that is rotating do not get caught as the robot rotates.
-
Check that the battery is secured well by the two velcro strap. The battery may shift if it is loose which will cause the motor to struggle to move the torso smoothly.
-
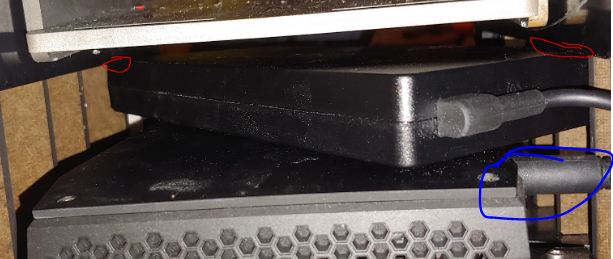
Make sure the power brick for the PC is securely under the computer bay ledge. If it is not the the power brick might not be level and may go above this height. If the brick is above the computer bay ledge it can collide with the torso causing the torso to stop or the power to turn off. There should be 19mm of clearance between the computer's power brick and the steel bottom plate of the battery bay. If there is less than this (especially less than 14 mm) you should check that the PC is seated well in its bay and there is no debris caught under it.
Battery Installation
Difficulty installing the battery
-
Make sure the cable is not getting caught when you install the battery
-
The battery fits snuggly into the steel bay. The battery should fit well if you insert the battery such that it is aligned with the compartment. Inserting the battery at an angle could lead to it getting stuck.


